How Can We Help?
Install Your Free SSL (AutoSSL)
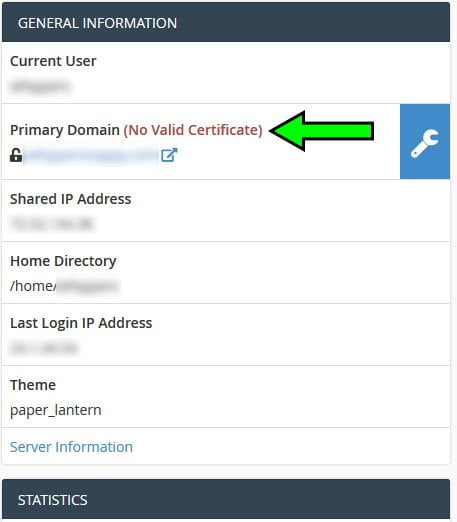
Installing your free SSL (autoSSL) is easily accomplished through your hosting account cPanel (Control Panel). Log into your cPanel account either through your Client Portal or directly through cPanel (https://yourdomain.com:2083/). Once logged in to your cPanel account you can check the SSL status of your primary domain in the General Information section on the right hand side of your cPanel dashboard.
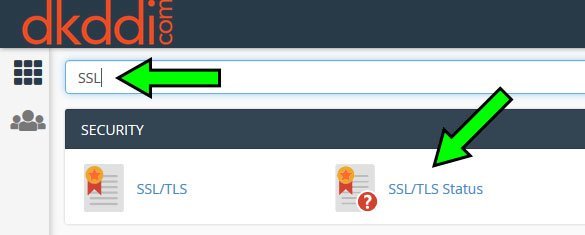
In the cPanel search bar type SSL, then click on SSL/TLS Status.
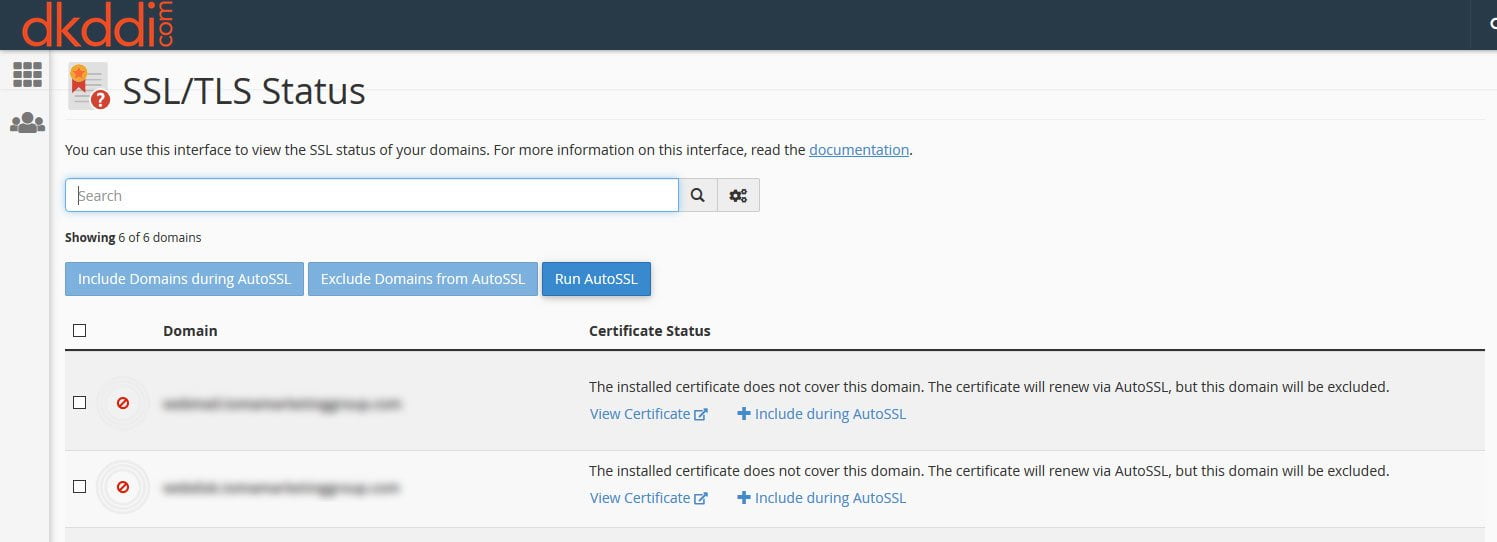
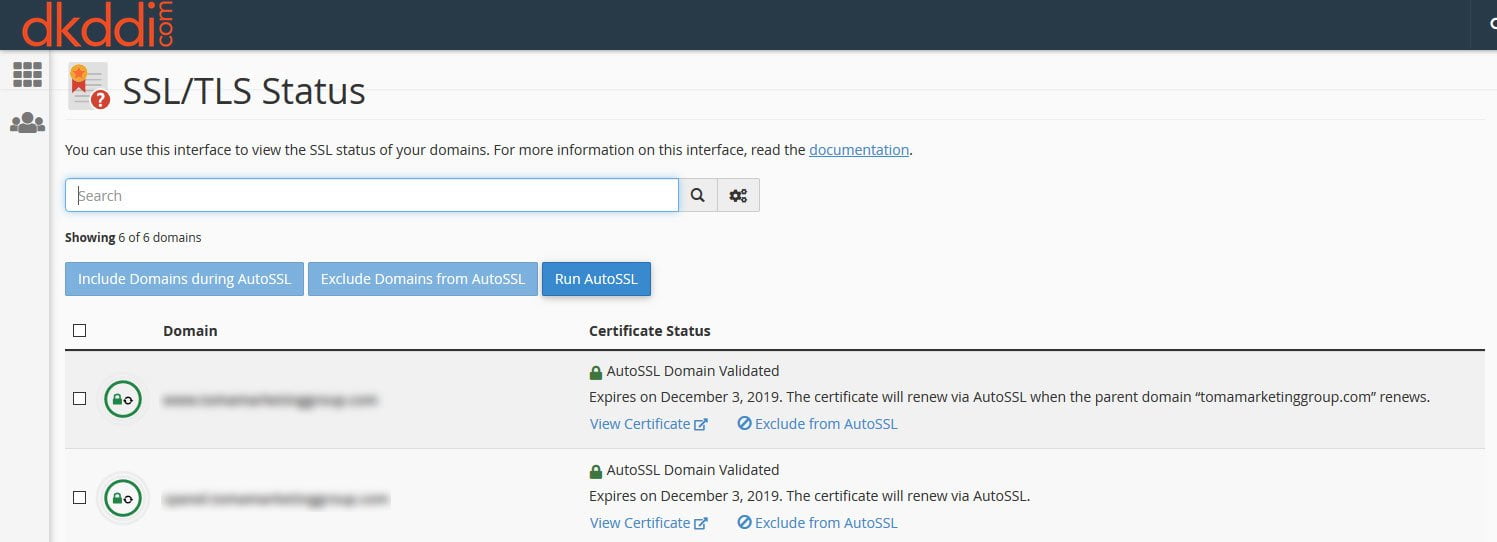
Once the SSL/TLS Status page has opened you can use the interface to view the SSL status of your domains. All variations of your domain should have a validated SSL with the exception of any that are assigned to third-party services i.e., externally hosted email. Click the Run AutoSSL button.
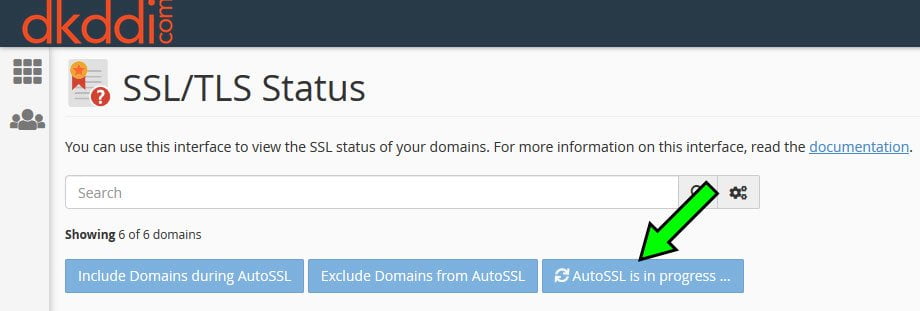
AutoSSL may take a while to complete, do not exit the page while AutoSSL is in progress.
Once you’ve completed the installation of your free SSL you will see the lock icon to indicate that the AutoSSL Domain Validated correctly. You may now set your website URLs to HTTPS protocol. Be sure that all assets and links, including images, css, and scripts are linked via HTTPS and not HTTP or unsecured website errors will be displayed in website browsers.
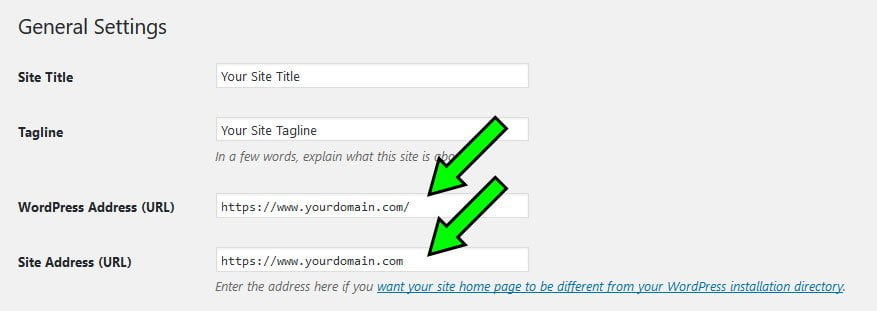
Helpful Tip: For WordPress installations set your WordPress and Site Address URLs to HTTPS. Navigate to Settings > General in WordPress.
If you still receive mixed or unsecured content warnings in your internet browser we recommend using an SSL plugin. One that we like is Really Simpl SSL by Rogier Lankhorst and Mark Wolters. SSL warnings are most commonly caused by image links and plugin assets linking via HTTP.


